For a while I’ve been working on automation inside of Azure, and a big part of that is using Azure’s REST API or the Microsoft Graph’s API. Now Microsoft does provide documentation on different APIs but it’s sometimes hard to understand the documentation and often takes a lot of time.
I was curious one day and was wondering what HTTP requests my browser was making when getting things within Azure, and I found that it calls the same APIs as you generally would, however, it tends to go through an intermediary before sending the request.
Example 1: Grabbing users from Graph
Now Microsoft does provide documentation on how to list users using the Graph API. However in lots of cases it’s hard to follow, and still takes a while to follow. In this example, we are going to get a list of all guests accounts in the organization using the Entra ID portal, and we are going to inspect the HTTP requests.
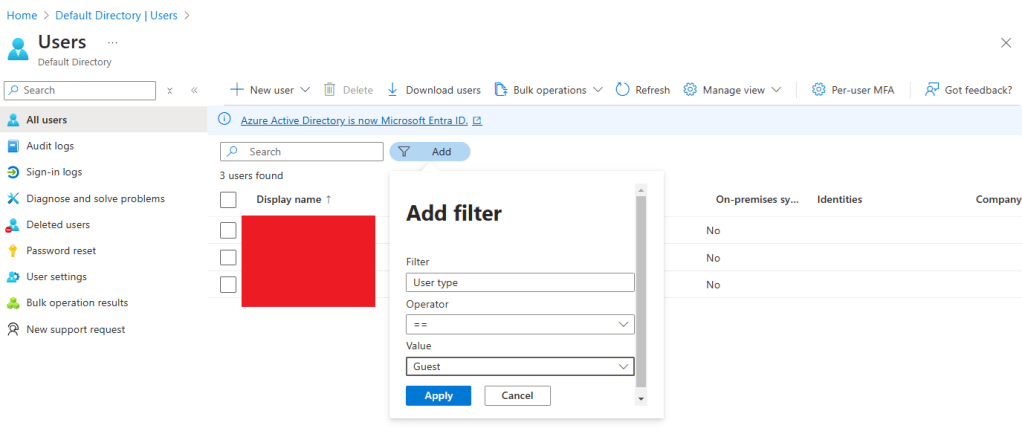
First from the Entra ID portal we will go to Users -> All Users and we are going to click the filter icon, and set ‘User type’ to ‘Guest’ and before we hit apply, we will click F12 (Or whatever button opens your developer console).
When you click ‘Apply’ you will see in the ‘Network’ tab that there was a request to grab these users.
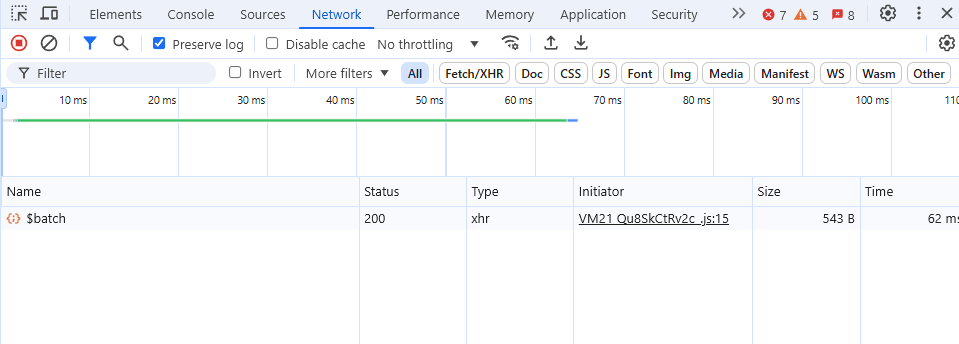
The first thing you will notice is that this isn’t a request directly to Graph and it is not even a POST request, it just calls the batch API.

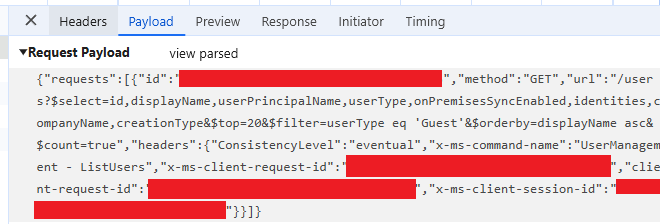
However, if we go to ‘Payload’ you’ll see that the actual request which was made
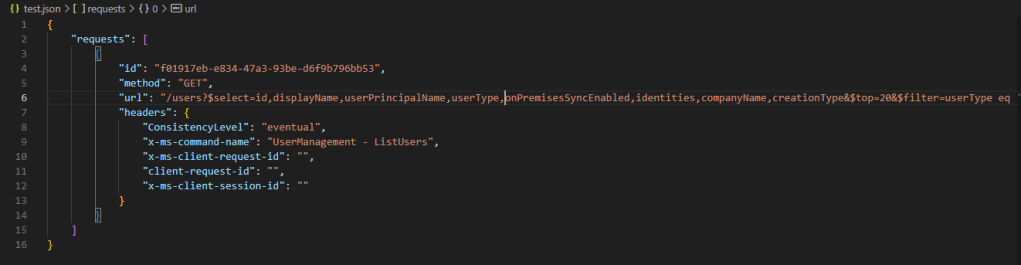
Now I find it easiest to just copy this into Visual Studio Code to look into this further. Create a file called test.json and paste it in and do ALT+SHIFT+F (For formatting)
You can see here that the payload contains a list of requests (In this case just 1) and you can see in the URL is the same as Graph API’s URL to get users, just without the first part of the URL.
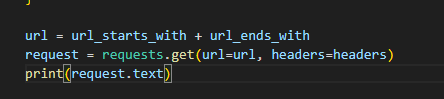
What we are going to do it copy the URL & Headers and turn this into an API request. We will first create a variable called ‘url_starts_with’ which equals “https://graph.microsoft.com/v1.0” then we will create a varaible called “url_ends_with” which contains the URL from the request we saw earlier.
It should look something like the below, I’ve removed some of the headers as they are not needed.

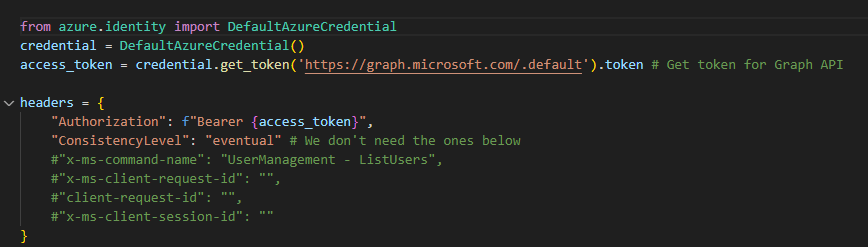
Now we are going to quickly implement the authentication, I will be using DefaultAzureCredential (Standard way to authenticate to Azure) and we will add the authentication token to the headers
Now we are going to form the request, you can see in the request from the browser that the method was set to ‘GET’, so we will make a GET request and we will combine the url_starts_with and url_ends_with to make the request and add the headers and just print the response.
Now the response is a bit hard to read, so I’ve copied it and put it into another JSON file and formatted it again.
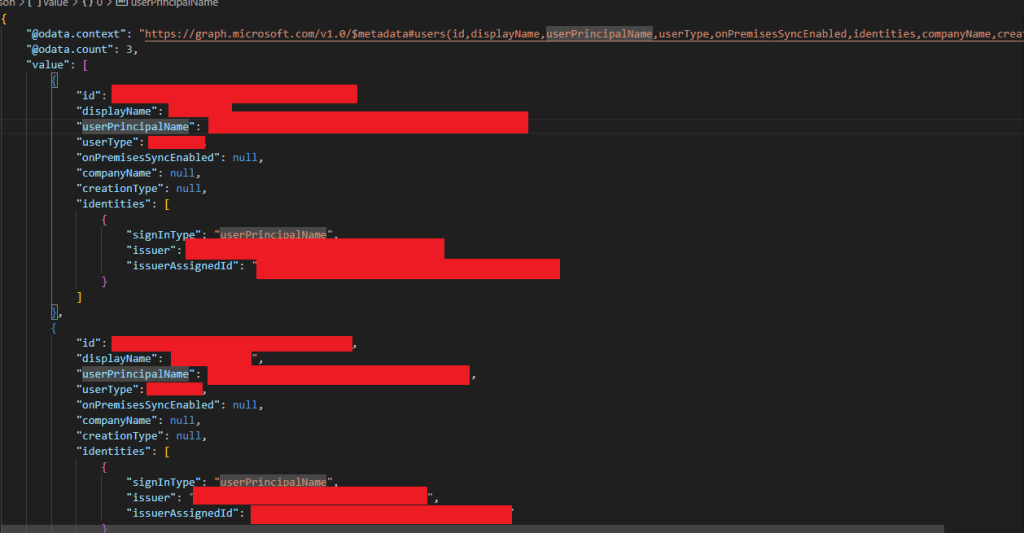
You can see that this API call ran successfully and returned results.
Now this is useful as it can help you find API calls and cut down time forming API requests. Say I had to add some complex filters for a request, I could do it in the portal and copy the request. You will need to make some slight changes to the request as sometimes doing this via the portal adds some extra headers or extra filters.
Example 2: Creating a Resource Group in Azure
We will be doing the same as the above, but this time it will be using the Azure Management API. Now generally, when creating resources in Azure it is best practice to write it as IaC where possible typically using Bicep or Terraform.
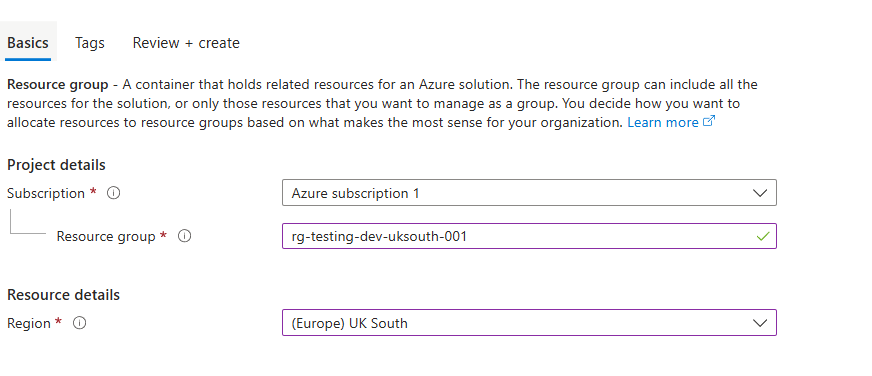
From Azure we will go to ‘Resource Groups’ ‘Create Resource Group’ and just give it an example name.
Once clicking ‘Review + Create’ you’ll see the first API request that your browser makes, which is just checking that you can create this resource. This isn’t what we are after, but it’s a good to know.
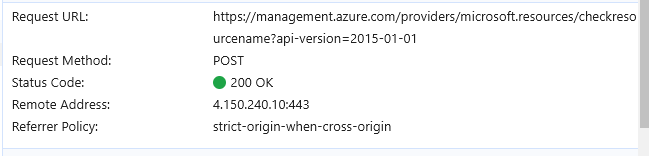
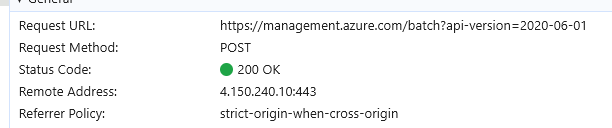
Once clicking ‘Create’ you’ll see a POST request in your browser just like before, also to management.azure.com but to the batch API similar to how it works in the portal.
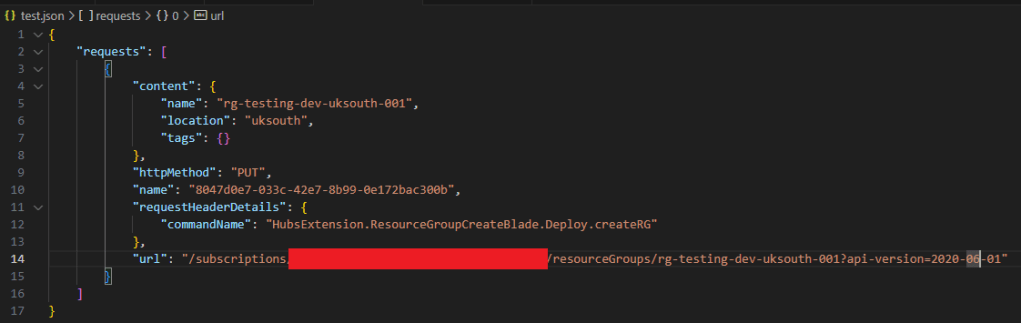
I’ll copy the request payload and put it into Visual Studio Code. You’ll see that it looks similar to Graph API request but it also now contains a ‘Content’ field (As it’s a PUT request not GET).
Now we are going to do the exact same thing as before in Python, setting the url_starts_with to management.azure.com adding the payload and just creating a resource group name as a variable and setting it to a PUT request.

Once run, you’ll see that the response in the console which says it succeeded.

Then from within Azure, you’ll see the new Resource Group.

I’ve found this to work with nearly everything within Azure, sometimes the URL’s will look a little different, but it’s saved me a lot of time compared to just figuring it out via the documentation. Sometimes I’ve found that new features that are added to the portal are not added to the API docs.
In conclusion, this is a quick and effective way to look at the API calls you need to make to use against Graph or Azure. It’s probably not fully supported, but it works well in scenarios where you need more than just the documentation.

Leave a comment